Student Onboarding Guide
(LMS + Participant Pay)
Make sure your browser is up to date on your laptop or desktop.
Breakout is compatible with Chrome, Safari, or Microsoft Edge and is only available on a desktop or laptop computer. It is not mobile compatible.
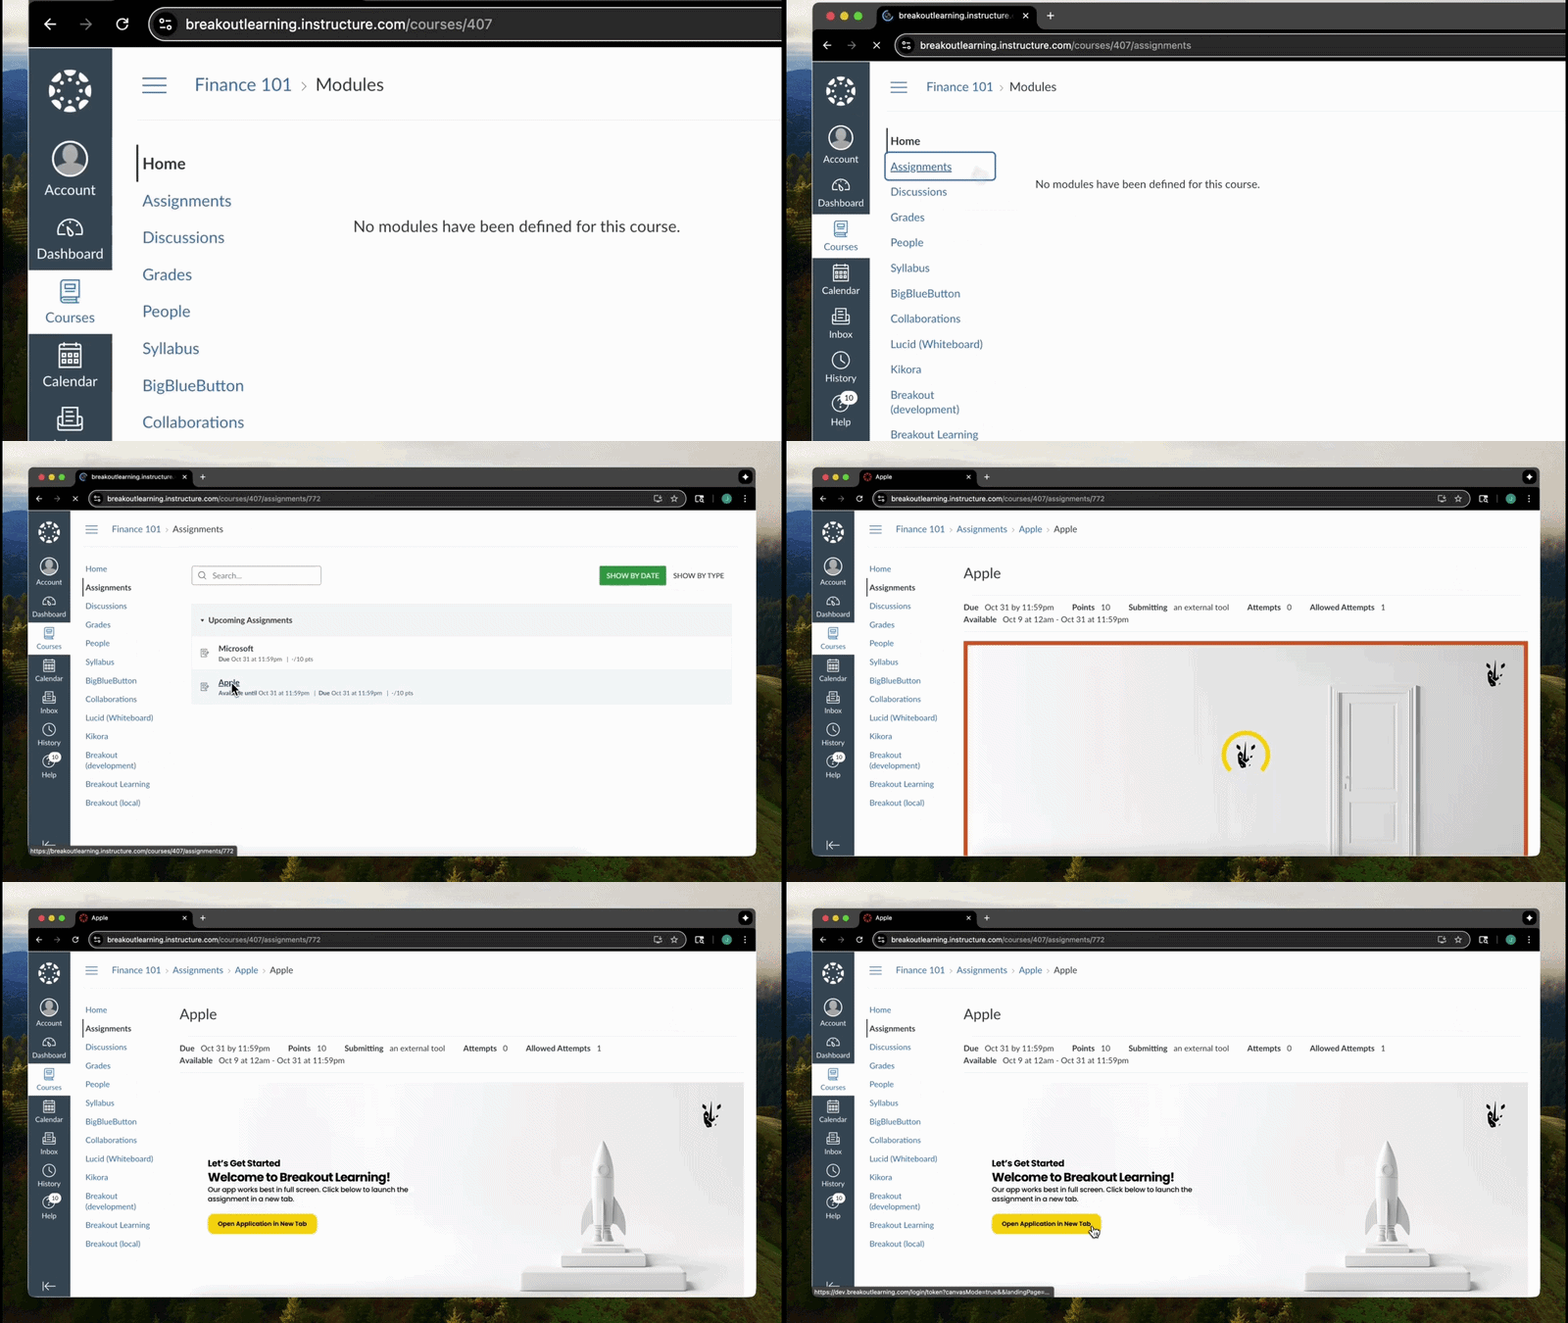
Navigate to the Breakout Learning assignment on your LMS.
- If you are using D2L: go to the Content page.
- If you are using Canvas: go to the Assignments page.
Click on the Breakout Learning assignment.
This will open a Breakout Learning window, displaying a welcome screen with an option to launch the full experience in a new tab.
Click "Open Application in New Tab".
.gif)
Complete your payment.
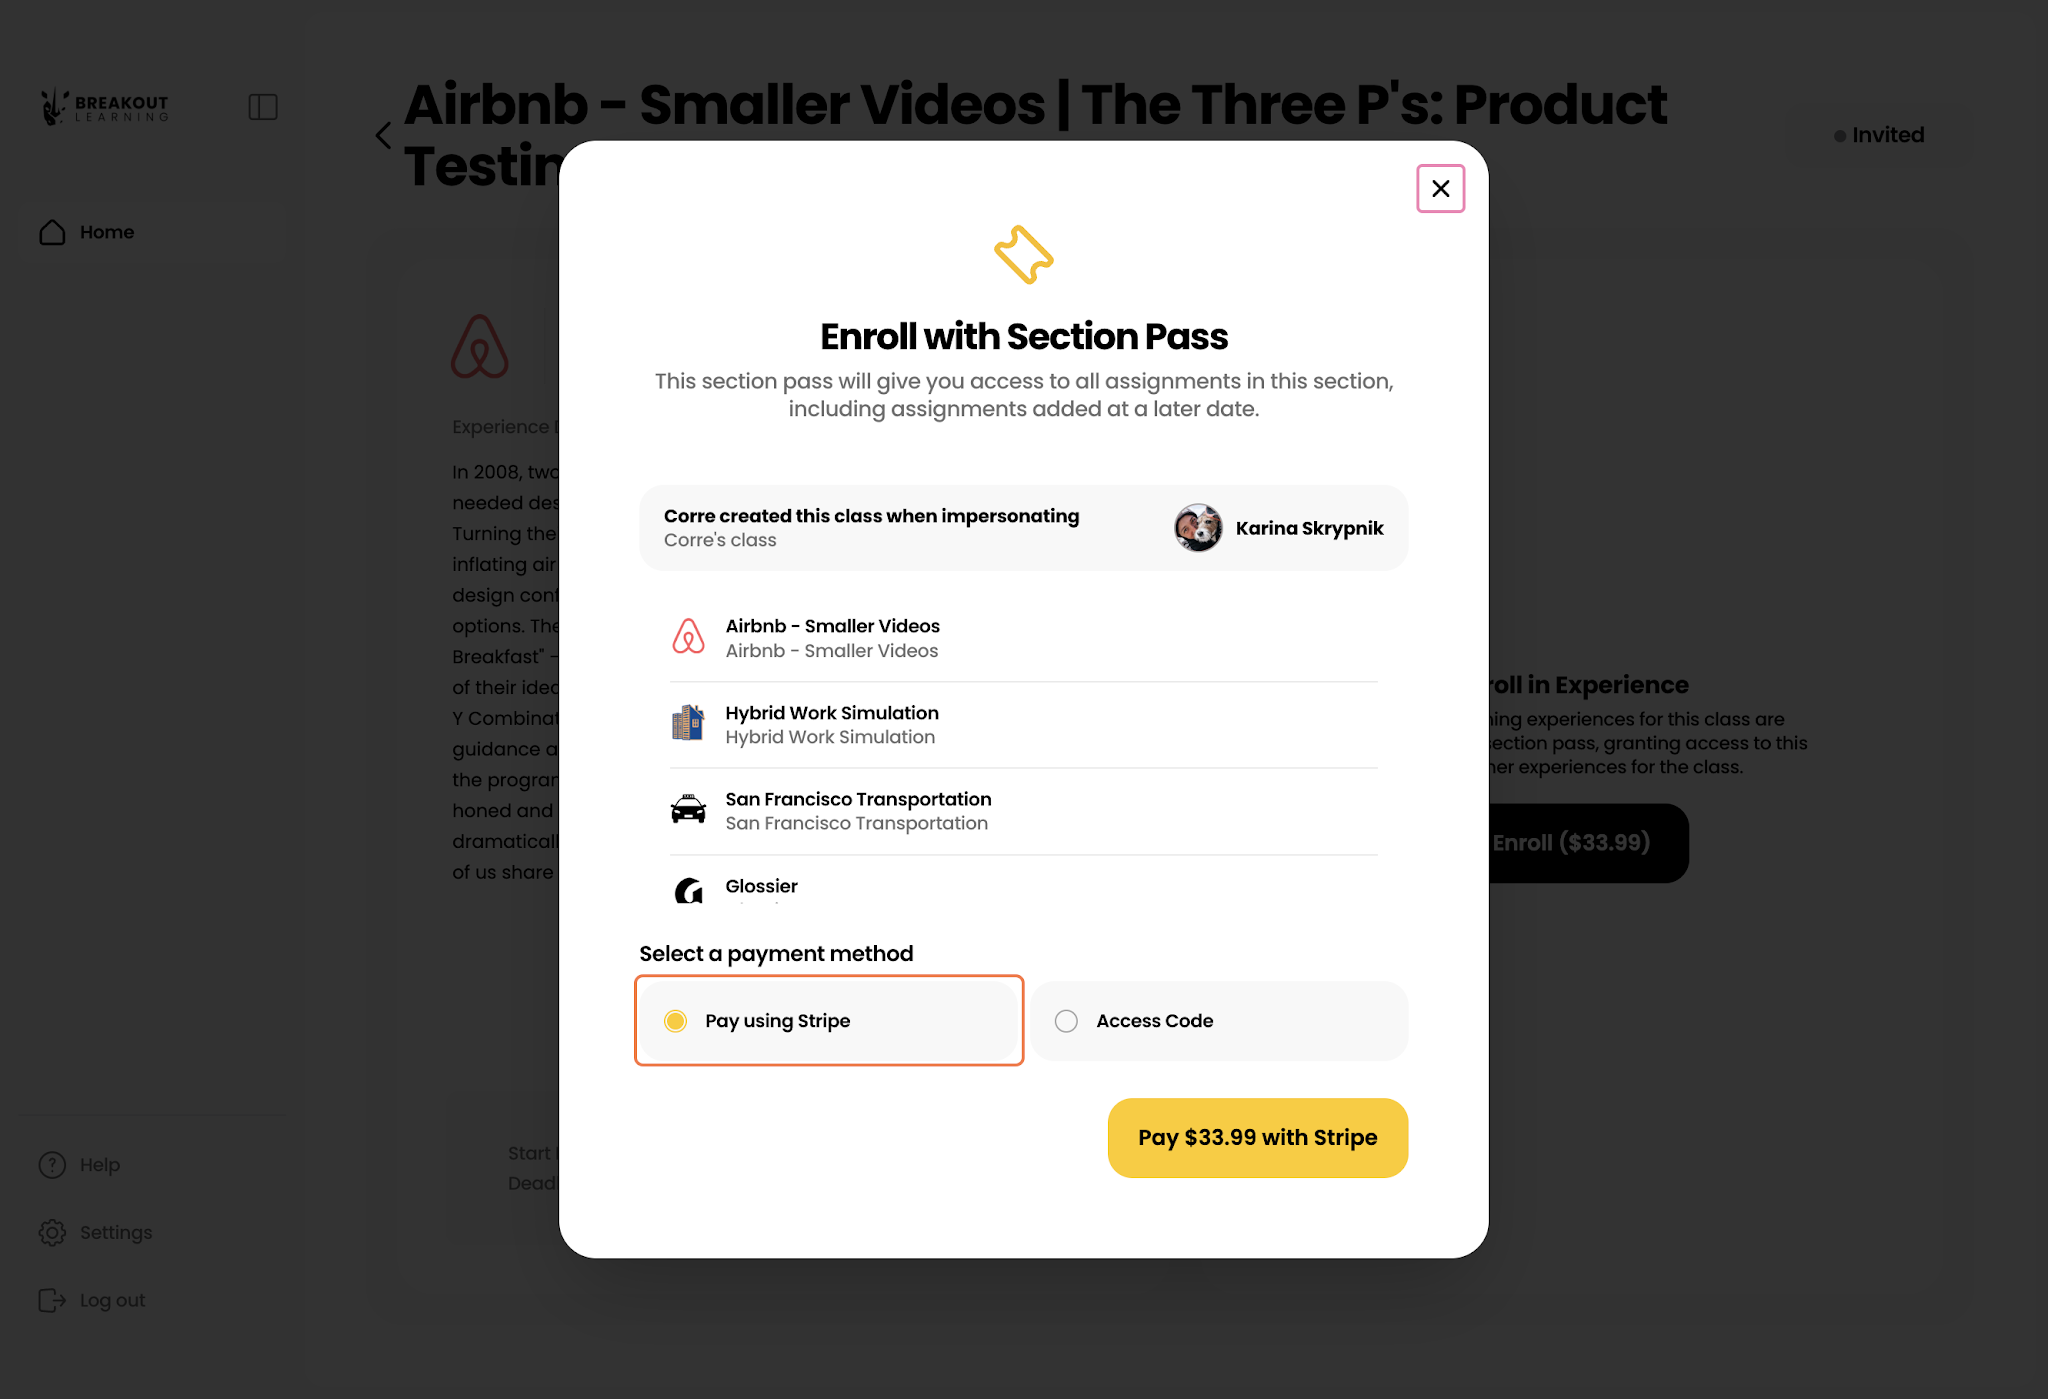
When you open your assignment for the first time, you will be prompted to pay. Depending on how your class is set up, you may see one or both of these options:
- Pay with Stripe: Select Pay using Stripe, then follow the prompts to enter your payment information and click Pay.
- Use an Access Code: Select Access Code and enter the code you received from your university's bookstore.
Join or Create Your Group
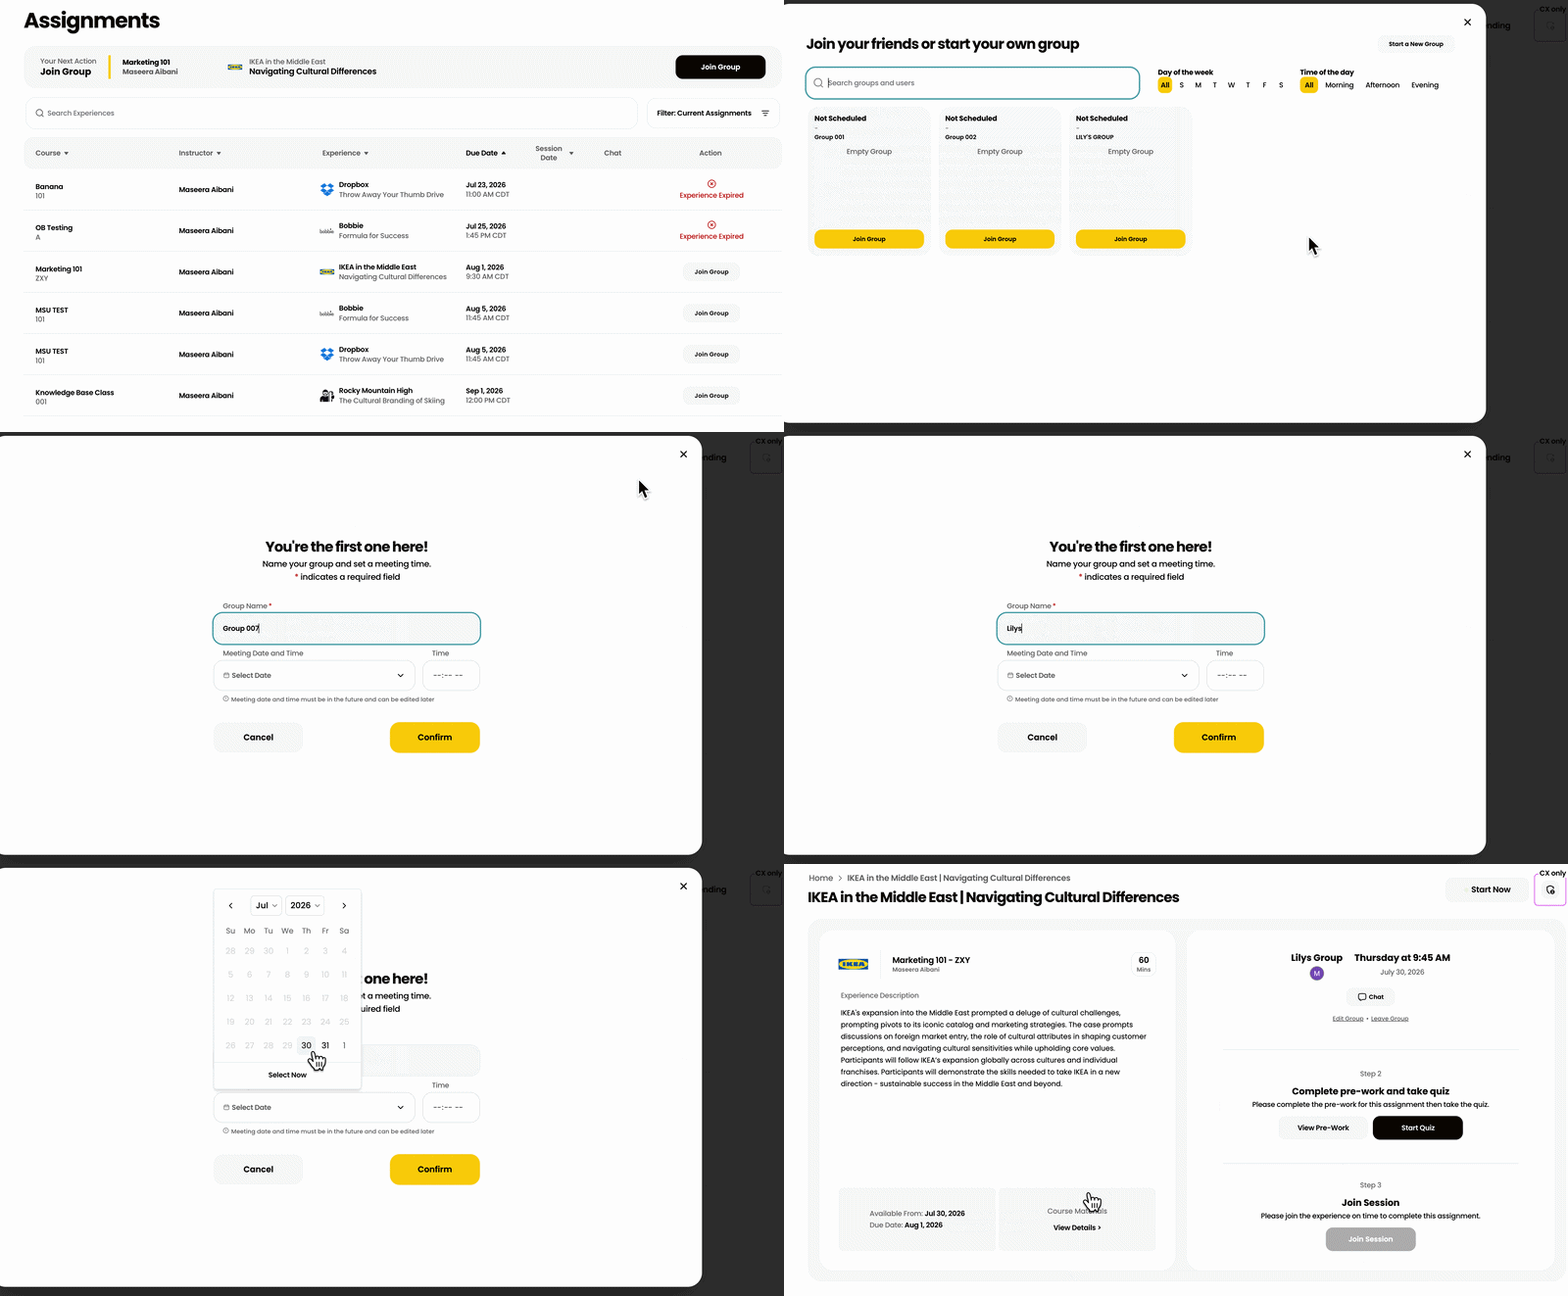
If your instructor has already placed you in a group, skip ahead to Step 7.
- Click Join Group.
- If there are empty pre-made groups available, join one and rename it.
- If not, click Start a New Group and give it a name that is easy for others to recognize.
- To switch groups, click Leave Group, then repeat the steps above to join or create a new group.
Schedule Your Group's Session.
- Use your group chat to agree on a date and time that works for everyone.
- Once you have decided, any group member can click Edit Group to lock in the session. Details can be changed later if needed. If a group member changes the session time, they should notify others so everyone is aware of the new date or time.
- Keep in mind your instructor may have set limits on available dates.
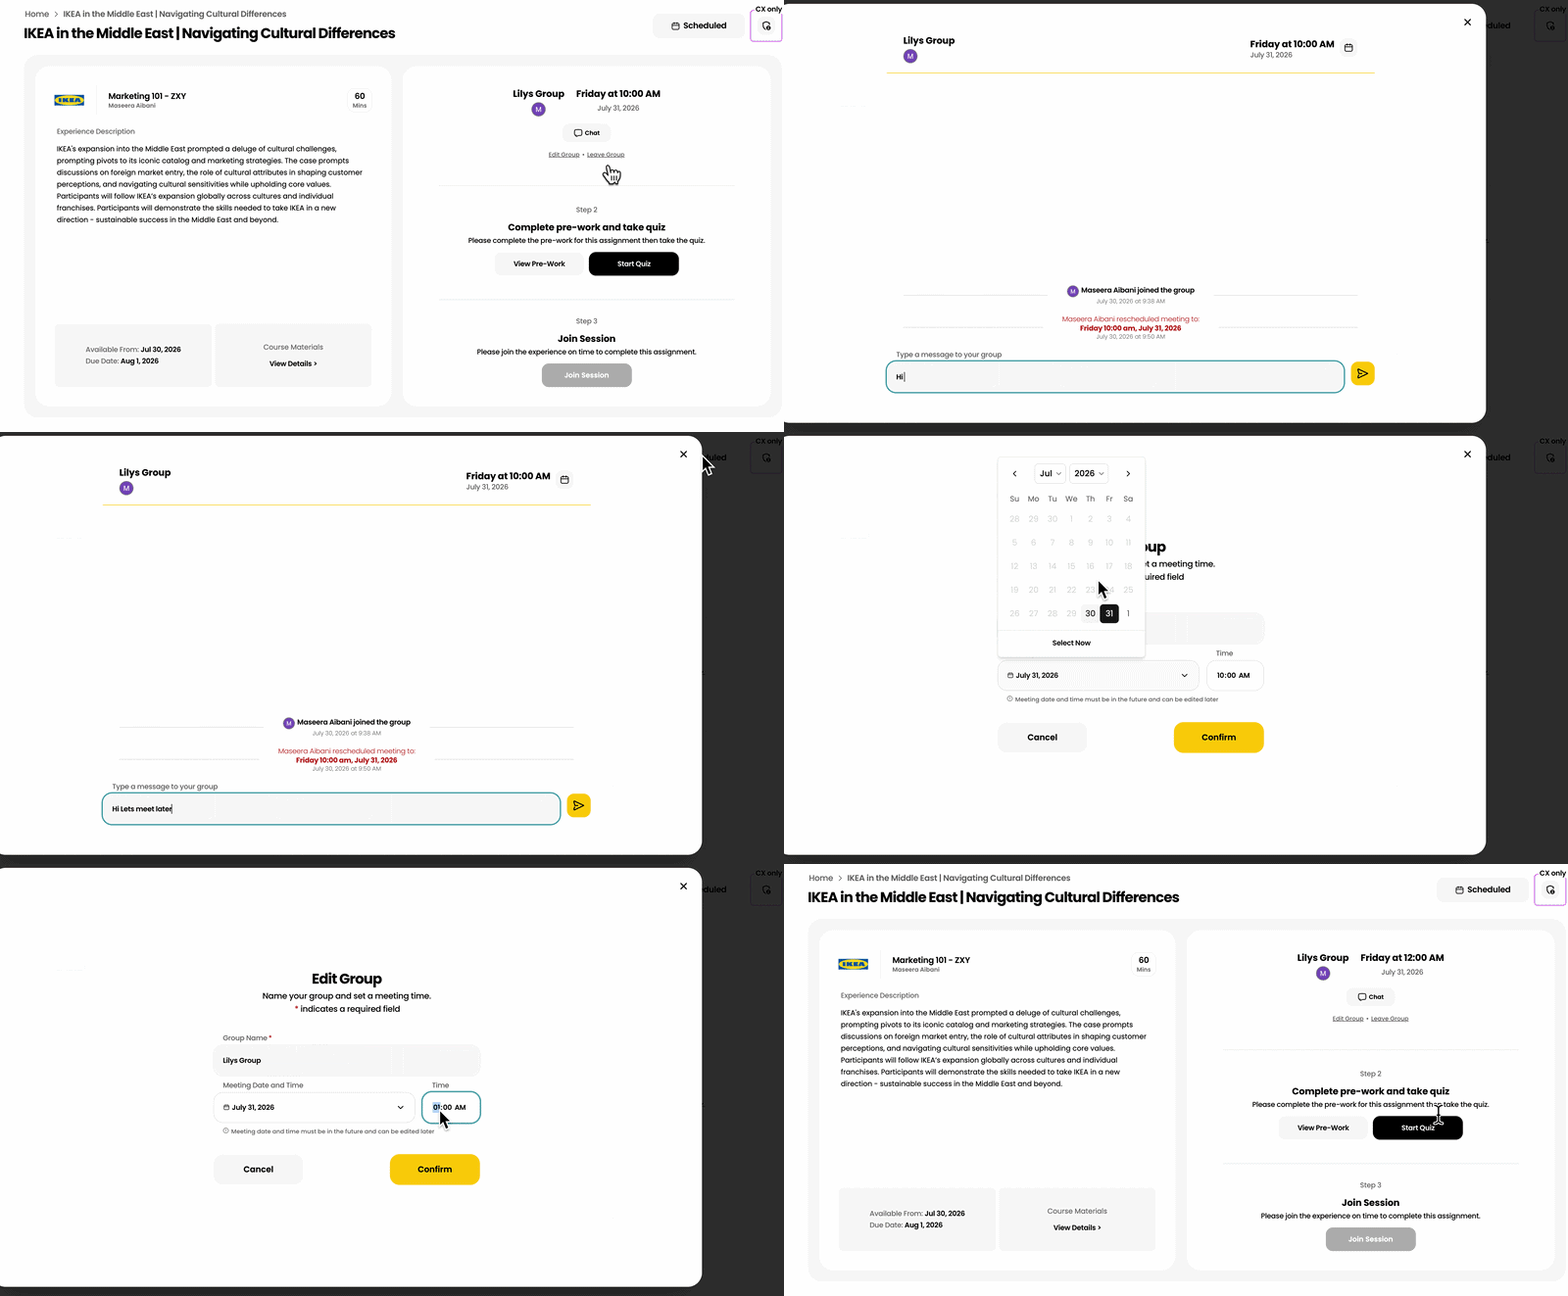
Complete the pre-work and quiz under Step 2.
If applicable, the pre-work and/or quiz is available under Course Materials.
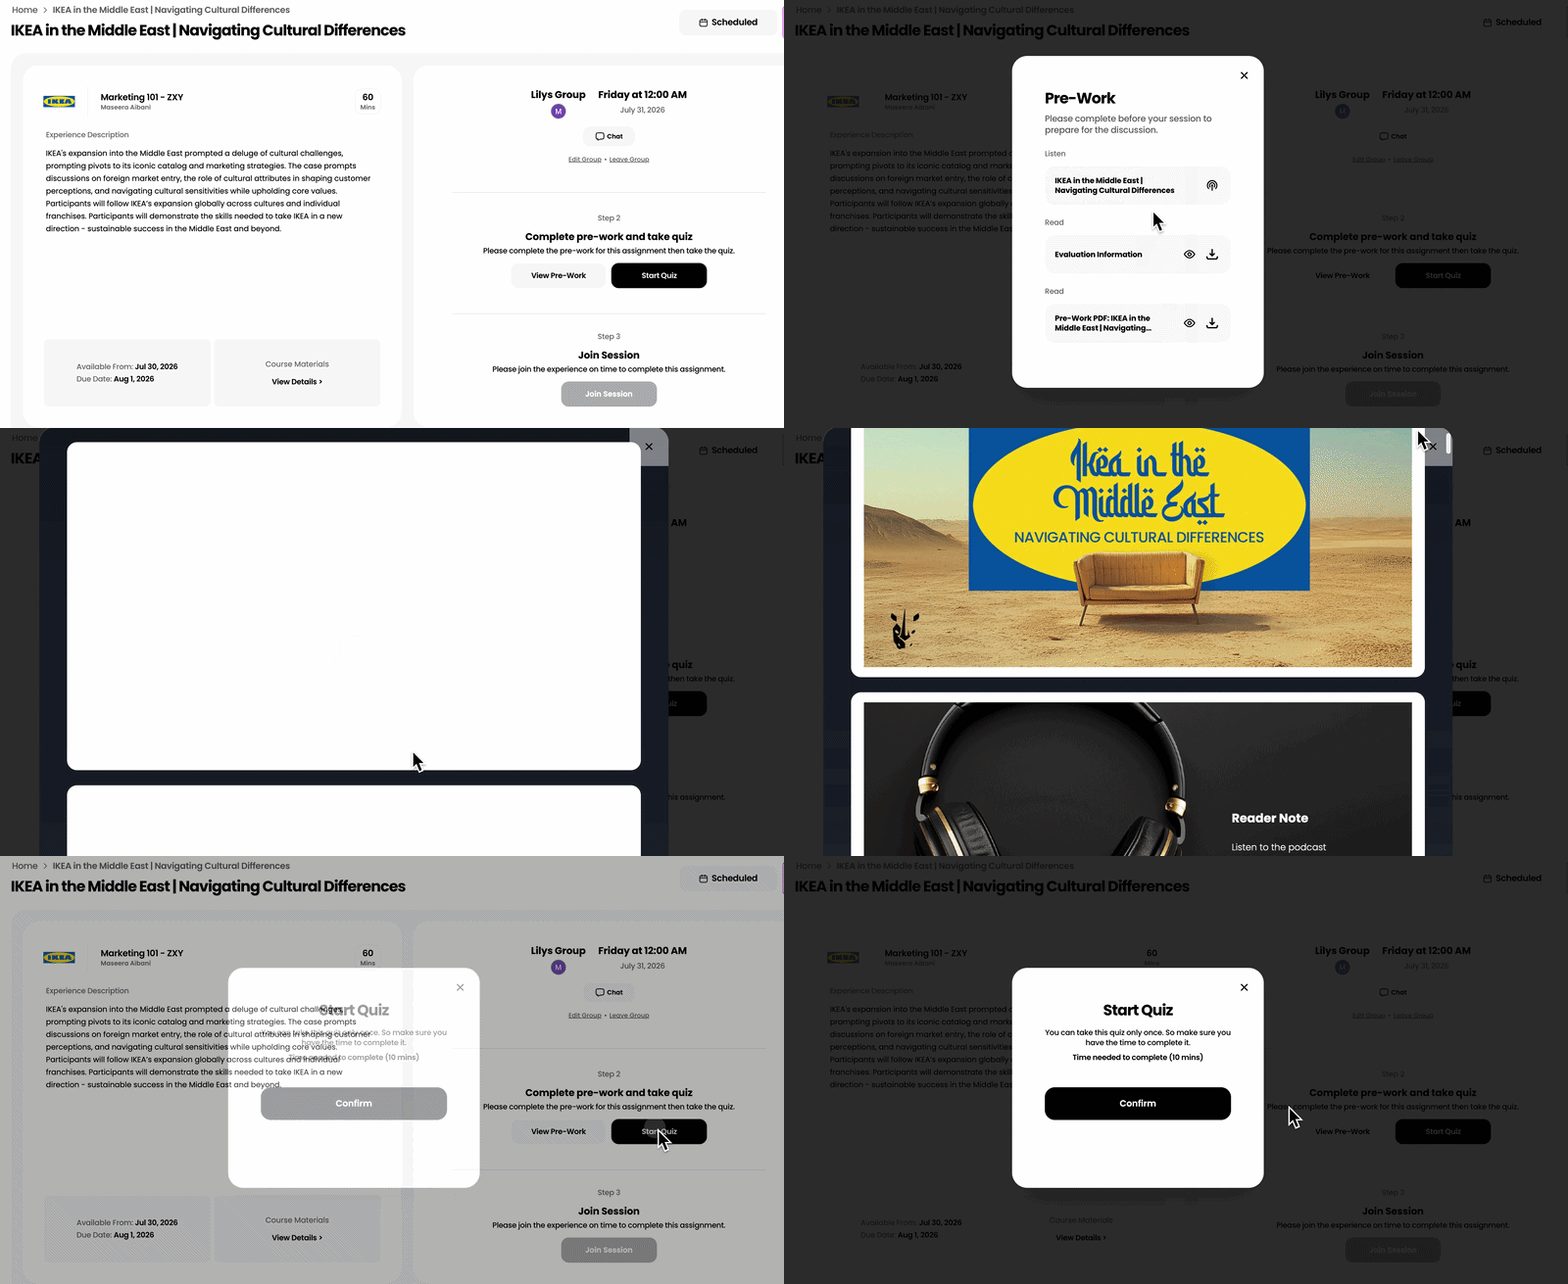
You're ready to join your session!
When your scheduled time arrives, reopen your assignment from your home screen to join. If a group member has not joined yet, give them about five minutes before starting without them.
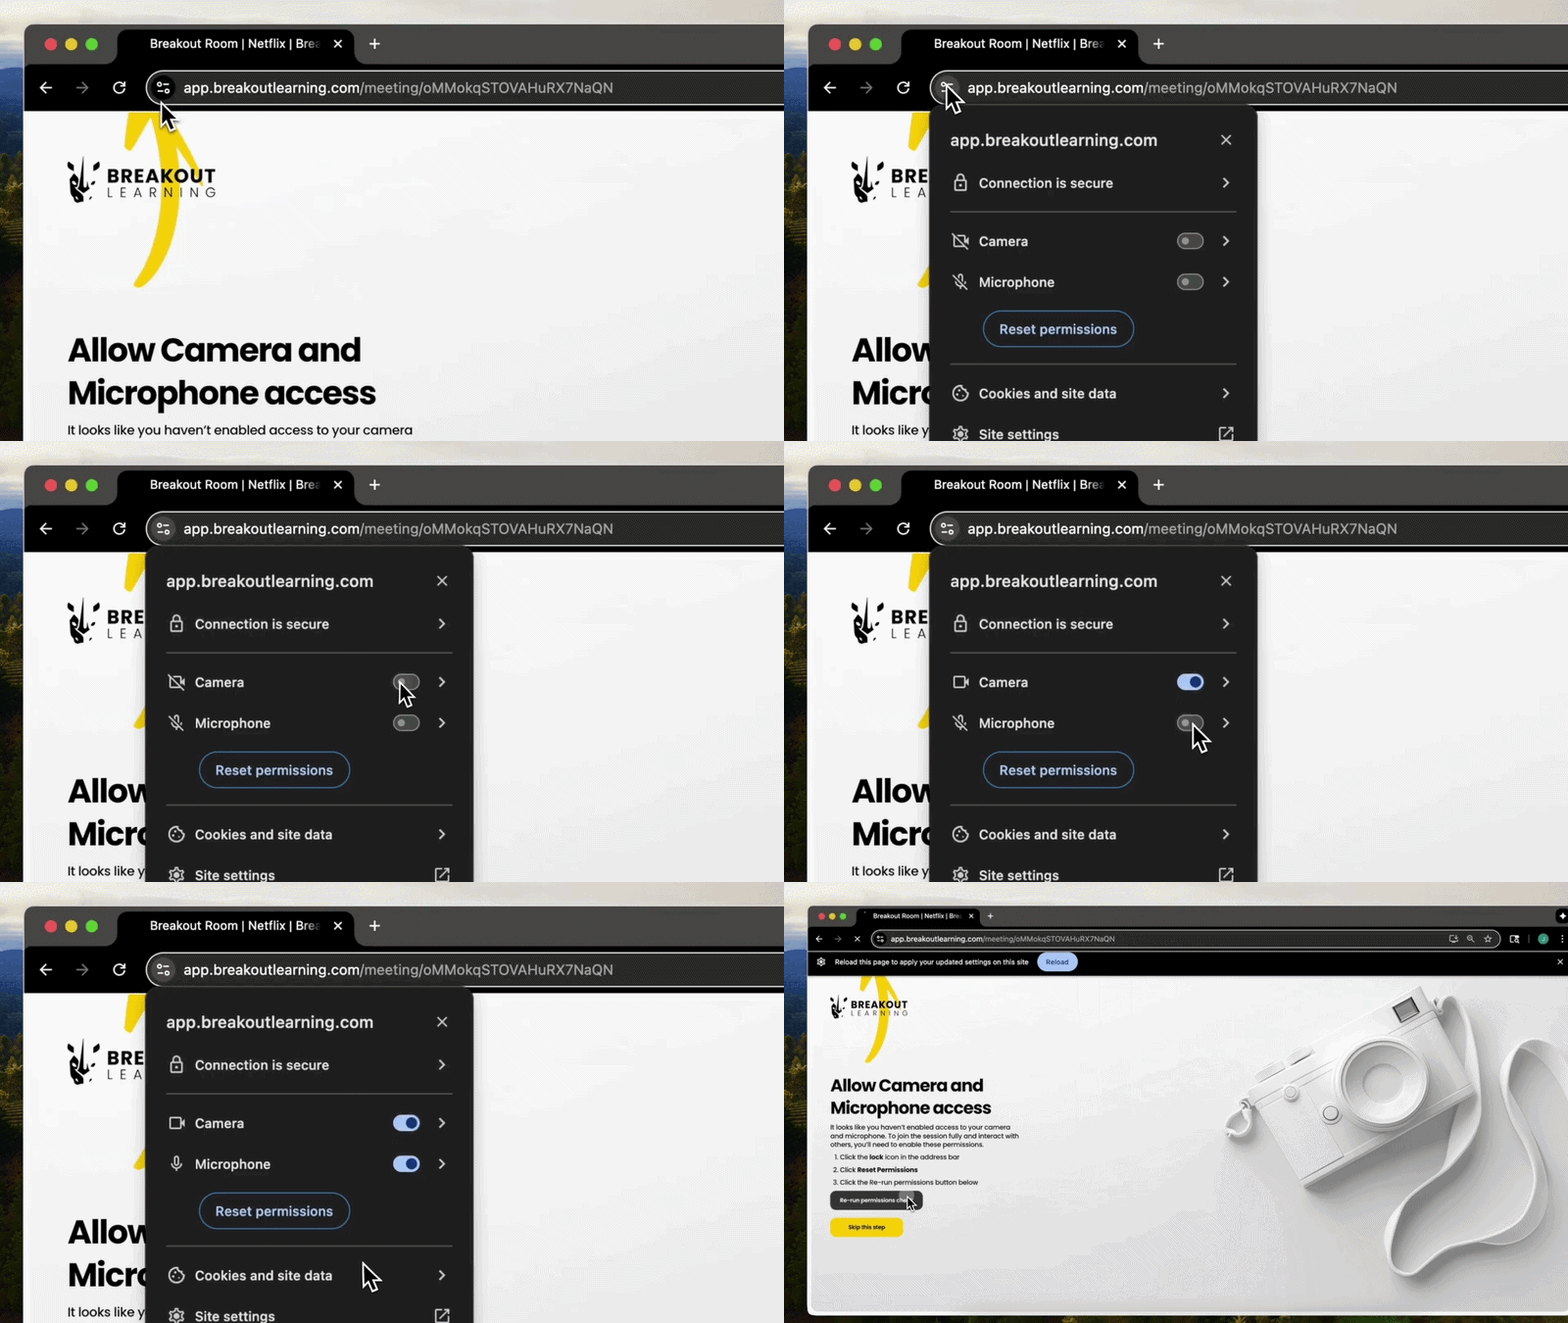
Grant Breakout access to your camera and microphone.
Your browser will ask for permission for Breakout to use your camera and microphone. Please grant access so you can be heard and seen in your group's discussion.
For assistance, visit the Breakout Learning Knowledge Base or contact support@breakoutlearning.com.